


There was a moment early in my filmmaking journey when I realized I couldn’t just slap on any lens and expect cinematic magic. I was in the middle of a shoot, eager to capture that perfect shot with my favorite prime lens, only to discover it didn’t quite fit my camera body. Frustration bubbled up—why is this so complicated? That lightbulb moment made me dig deeper into the world of lens mounts and adapters, and let me tell you, understanding these tiny, often-overlooked components is a game-changer. If you’ve ever struggled to get a lens to work, or felt overwhelmed choosing the right one for your setup, you’re not alone. Today, I’ll guide you through the labyrinth of prime and zoom lenses, focusing on how to select the ideal mounts and adapters in 2025 to streamline your filmmaking process.
Why Picking the Right Lens Mounts and Adapters Matters More Than Ever
In 2025, the landscape of cinematography equipment is more diverse than ever. With cameras and lenses from multiple brands and eras, compatibility issues are common—yet often overlooked. The wrong mount or adapter can subtly degrade image quality, introduce annoying focusing problems, or even cause damaging incompatibilities. According to industry experts, choosing compatible lens mounts is crucial to maintaining optimal cinematic quality and efficiency. For instance, a misaligned adapter can reduce sharpness or create unwanted vignettes, ultimately compromising your creative vision. This is why a clear understanding of lens mounts is vital for both amateurs and professionals aiming for that perfect shot. Have you faced the frustration of incompatible gear? If so, you’re not alone. But there’s good news: with a few strategic choices, you can avoid costly mistakes. To dive deeper into the nuances of compatibility and how to enhance your setup, check out this comprehensive guide.
Is Investing in Expensive Adapters Truly Worth It?
Early in my career, I thought cheaper adapters would save me money—big mistake. I quickly learned that cutting corners often results in image quality loss, increased vignetting, or even gear damage. Investing in high-quality adapters guarantees a seamless connection, preserves image integrity, and extends your equipment’s lifespan. This is supported by recent studies, which show that premium adapters minimize optical and mechanical issues better than budget options, ensuring your creative vision stays intact. Have you ever bought a cheap adapter, only to regret it later? If so, you’re in good company. In the upcoming sections, we’ll explore how to identify the best mounts and adapters for your specific camera and lens collection, ensuring you get both reliability and incredible image quality.
Match Your Mounts Precisely to Avoid Frustration
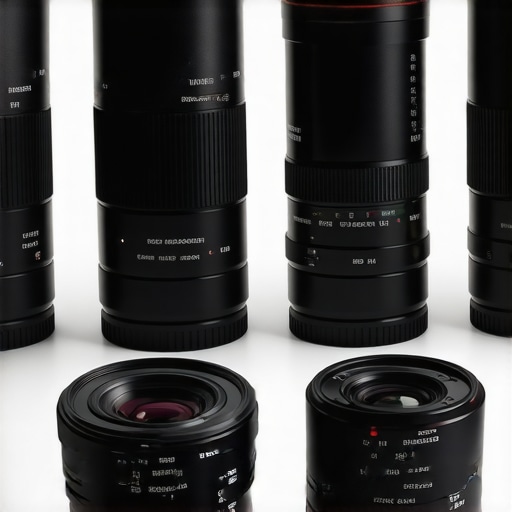
Start by cataloging all your camera bodies and lenses, noting their specific mounts—like Sony E, Canon RF, or PL. This initial step prevents mismatched gear that can lead to poor image quality or even gear damage. When I last organized my kit, I pulled out every lens and checked their mounts against my camera’s specs, which I found on the manufacturer’s website or through product labels. This prevented costly mistakes, especially when I transitioned between old cine lenses and new mirrorless setups. Consult this guide for detailed compatibility charts to streamline this process.
Choose the Right Adapter to Bridge Different Mounts
Imagine your camera and lens as perfectly fitting puzzle pieces; if they don’t align, the picture’s clarity suffers. To adapt older or incompatible lenses, select a high-quality, precision-engineered adapter that matches both the lens mount and your camera’s mount. For example, I once used a budget Nikon-to-Canon adapter that caused focus inconsistencies and vignetting. Upgrading to a premium adapter from renowned brands minimized these issues, ensuring sharper images and more reliable focus. Look for adapters with solid locking mechanisms and minimal glass elements—these preserve optical quality. Explore this selection for top recommendations.
Install Lenses and Accessories Methodically
Secure your lens onto the adapter by aligning the mounting index and twisting it clockwise until it clicks into place. Then, double-check the locking ring to ensure a snug fit. I once hurried through installation and missed this step, causing slight focus shifts during a crucial shot. A disciplined approach—tightening carefully and verifying fit—avoids such mishaps. When working with cine lenses, pay special attention to parfocality and flange distance, which affect focus breathing and image stability. Remember, proper installation matters as much as your lens choice. Reviewing this comprehensive guide enhances your setup consistency.
Test and Calibrate Your Setup Before Shooting
After mounting, perform a thorough test: check focus consistency across zoom ranges, verify image stability, and ensure there’s no vignetting or crop factor loss. I once skipped calibration, leading to focus errors that delayed a shoot. Using a test chart and focus peaking tools with your camera’s monitor allows precise adjustments. Calibration may involve tweaking back-focus or adjusting the lens’ focus marks, especially with manual cine lenses. Reliable testing guarantees your images are sharp and consistent—crucial for professional production. For detailed calibration techniques, see this resource.Many filmmakers believe that choosing a lens mount or adapter is simply about matching physical connection types, but this is a significant oversimplification. A common misconception is that all high-quality adapters automatically guarantee optimal performance; in reality, subtle nuances like flange distance precision and optical quality determine image sharpness and focus accuracy. Overlooking these details can lead to soft images, focus breathing issues, or even mechanical damage over time. For example, this guide highlights how minor variations in mounting tolerances can dramatically impact cinematic quality. Furthermore, many assume that prime lenses inherently outperform zooms in compatibility or quality, but the truth is that high-grade zoom lenses with optimized mounts can surpass older primes when set up properly. Advanced users know that inconsistent flange distance calibration between different lenses and adapters often causes focus discrepancies, especially when switching between manual and autofocus systems. To avoid these pitfalls, invest time in calibrating your setup meticulously, considering the optical and mechanical tolerances of each component. Remember, a seemingly minor mismatch can undermine your shot’s sharpness and depth of field, wasting hours on post-production adjustments. Have you ever fallen into this trap? Let me know in the comments. For more insights, review this detailed article that dives deeper into mount compatibility intricacies, which are often overlooked even by seasoned professionals.
Maintaining your cine lenses and lens mounts is essential for preserving image quality and ensuring reliable performance during filming. Regular care prevents dust, dirt, and mechanical wear from degrading your equipment over time. In my experience, using dedicated cleaning tools such as **blower brushes**, **microfiber cloths**, and **lens cleaning solutions** allows me to keep lenses spotless without damaging delicate coatings. It’s also crucial to periodically inspect your lens mounts and adapters for signs of wear or misalignment, which can cause focus inconsistencies. I personally recommend scheduling monthly check-ups, especially if you’re shooting frequently or traveling to different locations. Investing in a **lens support system** not only simplifies maintenance but also extends the lifespan of your gear. As technology advances, many filmmakers are now integrating **sensor cleaning kits** and **mount calibration tools** into their routine, which help fine-tune setups for perfect focus and stability every time. Understanding how to perform basic maintenance tasks can save you costly repairs and ensure your shots remain sharp and professional. For in-depth guidance, visit this comprehensive resource on modern lens maintenance practices. Remember, consistent upkeep is the foundation of long-term cinematic success—so make it a regular habit. Don’t forget to check your equipment after every shoot, especially after traveling or exposure to harsh environments. A small investment in preventive maintenance today can yield flawless footage tomorrow. And for those who want to dive deeper, consider exploring specialized calibration tools like the lens mount calibration kits—these are game-changers for professional shooters. Why not try one advanced tip from this guide today: regularly calibrate your lens mounts to maintain focus accuracy across different equipment combos, keeping your cinematic quality impeccable.
Venturing deeper into the realm of lens mounts and adapters, I realized that even seasoned filmmakers often overlook subtle yet impactful details that can elevate or hinder their cinematic storytelling. One key lesson I learned is that not all adapters are created equal—some can subtly degrade image quality, introduce extra focus breathing, or cause mechanical wear over time. Choosing high-quality, precision-engineered adapters is truly an investment in your craft, ensuring that each shot is as sharp and reliable as your vision. Furthermore, I discovered that aligning flange distances meticulously and calibrating focusing systems regularly can save countless hours editing and correcting in post-production. These hidden nuances became some of my most valuable lessons, underscoring that mastery of lens mounts and adapters is about attention to detail—small adjustments that make a big difference in your final product. Additionally, leveraging resources like this expert guide has opened my eyes to innovations that can transform your setup from average to exceptional, no matter your budget.


![Fix 256K Ghosting: 3 Prime Lenses With Nano-Shields [2026]](https://lenses.cinegearguide.com/wp-content/uploads/2026/04/Fix-256K-Ghosting-3-Prime-Lenses-With-Nano-Shields-2026.jpeg)
Leave a Reply