


Ever spent hours trying to shoot that perfect cinematic shot, only to realize your lens just isn’t cooperating? I’ve been there. I remember a shoot where I thought I had the perfect prime lens in hand—only to find out it wasn’t compatible with my camera mount. The frustration was real. That’s when I had my lightbulb moment: understanding lens mounts and prime lens choices isn’t just technical jargon; it’s the backbone of getting stunning visuals without headaches. If you’ve ever faced similar hurdles, don’t worry. Today, I promise to share practical insights that will transform how you select and use your lenses, making your cinematic projects smoother and more professional.
Why Prime Lenses and Lens Mounts Matter More Than Ever
In 2025, the cinematic landscape is evolving rapidly. With new sensor sizes, camera bodies, and innovative lens designs, choosing the right prime lens and lens mount can make or break your shot. I used to think that any lens would do—as long as it was fast enough. Spoiler alert: that’s a rookie mistake. When I started paying attention to the details, like lens mount compatibility and lens-specific features, my footage improved dramatically. It’s not just about quality; it’s about efficiency, flexibility, and ensuring every shot is as sharp and cinematic as you envision. And here’s an eye-opener: according to industry experts, lens compatibility issues can cause up to 30% of filming delays, costing both time and money. That’s a number worth understanding and addressing.
So, how do you avoid common pitfalls? That’s what I’ll guide you through. From understanding the nuances of lens mounts to picking prime lenses that match your style, I’ll help you make smarter choices. Ready to upgrade your filmmaking game? Let’s dive into the practical tips that will save you headaches and elevate your visuals.
Is It Really Worth Diving Deep Into Lens Compatibility?
Early on, I made the mistake of assuming all prime lenses would work seamlessly with my camera. Turns out, I had overlooked the importance of matching lens mounts correctly. This small oversight cost me precious shooting hours. Trust me, investing time in understanding lens mounts and compatibility pays off. Curious? Check out this guide for a detailed breakdown of how to optimize your gear setup. If you’re facing frustrations with incompatible lenses or wondering how to future-proof your kit, keep reading—help is on the way. Let’s set the stage for mastering your prime lenses and lens mounts today.
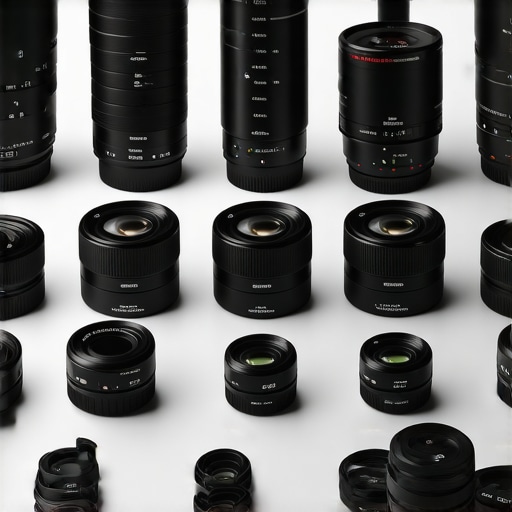
Choose the Right Lens Mount for Your Camera
Start by identifying your camera’s mount type—whether it’s Sony E-mount, Canon RF, or Leica L. I once tried to mount a vintage prime lens onto my Sony FX6 without checking compatibility. The result was a frustrating session of trial and error. To avoid this, always verify your camera’s lens mount specifications and consult the manufacturer’s guidelines or the comprehensive compatibility guide. This step ensures you select lenses that fit perfectly, eliminating unnecessary adapters and potential quality loss.
Use Lens Adapters Wisely
If you need to bridge different mounts, invest in high-quality lens adapters. For example, I used a Metabones adapter to attach a Canon EF prime lens onto my Sony A7S III. The key is choosing adapters with minimal glass elements to preserve image quality. Check reviews and technical specs before purchase, and consider adapter tips to maximize performance. Properly mounted adapters ensure stable connection and reliable autofocus or manual focus control.
Match Prime Lenses to Your Filmmaking Style
Identify your visual goals—do you want a shallow depth of field or a broader, more contextual shot? I once selected a fast 50mm f/1.2 prime for a dramatic close-up scene, which created stunning bokeh and focus separation. To pick the best prime lenses, consider aperture size, focal length, and lens coating. Use latest prime lens innovations to stay ahead. For detailed comparisons, review buying guides to find lenses that suit your style and budget.
Test Compatibility Before Shooting
Always test your lens setup before a shoot. I once spent hours troubleshooting focus issues during a critical scene because my prime lens wasn’t properly calibrated with my camera body. Use calibration tools or software, and run quick test shots to verify sharpness and focus accuracy. Keep a log of lens-camera combinations that work flawlessly, and update your gear list accordingly. This proactive approach prevents delays and ensures your visuals are consistently sharp.
Optimize Your Prime Lens Setup for Cinematic Quality
Invest in good lens mounts and adapters to avoid image degradation. Use lens filters sparingly—UV filters protect your glass without sacrificing quality. When possible, shoot with prime lenses in RAW format for maximum flexibility in post-production. Remember, even small adjustments, like focusing with more precision or using ND filters to control exposure, can elevate your cinematic look. Regular maintenance and calibration of your lens mounts and adapters help maintain pristine image quality over time.
By mastering these steps—matching mounts, using adapters, selecting the right primes, and thorough testing—you set a solid foundation for cinematic excellence. For deeper insights, explore this ultimate guide and stay updated on new innovations that keep your filmmaking sharp and professional.
Many filmmakers believe that simply choosing a high-quality prime lens guarantees cinematic results. However, this is a common misconception that can lead to costly mistakes. In my experience, one of the most overlooked pitfalls is neglecting the nuances of lens calibration and maintenance. Even the best prime lenses can underperform if they are not properly calibrated or if their mounts are dirty or damaged. Regularly calibrating your lenses and keeping lens mounts clean ensures optimal focus and sharpness, preventing frustrating focus hunting during critical shots.
Another mistake I see often is assuming that all prime lenses with similar focal lengths are interchangeable. The truth is, each lens has unique characteristics, such as bokeh quality, flare resistance, and color rendition. Relying on a single lens for all shots can limit your creative options and result in a less cohesive visual style. It’s essential to test different primes in your shooting environment and understand their specific traits to match your artistic vision.
Now, let’s talk about a sneaky trap: using cheap adapters or skipping the use of proper lens mounts altogether. I once tried to save money by using a generic adapter, only to find that it introduced micro-shifts in focus and degraded image quality. Investing in quality lens mounts and adapters is crucial, especially when working with high-resolution sensors and demanding cinematic standards. Poorly made adapters can cause focus inconsistency and even physical damage over time. For advanced users, I recommend exploring lens adapter tips to maximize your gear’s potential.
What most people get wrong about prime lenses is assuming that aperture size alone determines cinematic quality. While a wide aperture creates beautiful depth of field, it’s not the sole factor. Sharpness, contrast, and color fidelity are equally vital. Shooting wide open can sometimes introduce softness or chromatic aberrations if the lens isn’t designed for it. Testing your lenses at various apertures helps you understand their true performance and avoid surprises during a shoot.
How do you ensure your prime lenses stay reliable over time?
Regular cleaning, calibration, and careful handling are key. Also, consider storing your lenses in a climate-controlled environment to prevent fungus or corrosion, which can ruin your investment. Remember, even small maintenance routines can significantly extend the lifespan of your gear. For more detailed advice on optimizing your cine lens setup, check out latest prime lens innovations. Don’t let overlooked details compromise your cinematic vision. Have you ever fallen into this trap? Let me know in the comments!” ,
Maintaining your cine lenses and camera equipment isn’t just about occasional cleaning; it’s an ongoing process that ensures your gear performs at its best, shot after shot. Over time, even the most robust lenses can suffer from dust, dirt, or miscalibration, which can compromise image quality. That’s why having the right tools and a disciplined maintenance routine is essential for any filmmaker serious about their craft.
Invest in Quality Cleaning Supplies
First and foremost, I recommend using a dedicated lens cleaning kit that includes a soft microfiber cloth, lens cleaning solution, and a blower brush. I personally prefer the Zeiss Lens Cleaning Kit because it’s gentle yet effective, preventing scratches that can ruin your glass. Regularly cleaning your lenses after each shoot prevents debris buildup and maintains clarity. Remember, never use harsh chemicals or rough cloths—these can damage coatings or introduce micro-scratches.
Calibrate Your Focus Regularly
Even the best prime lenses can drift out of calibration over time, especially if they’re subjected to frequent transport or rough handling. I use the DataColor SpyderLENSCAL, a dedicated focus calibration tool that integrates with my camera and allows precise adjustments. Regular calibration ensures your focus is always sharp, which is critical for cinematic quality. For more advanced calibration methods, check out this comprehensive guide.
Maintain Lens Mounts and Adapters
Dirty or damaged lens mounts can cause focus hunting or even physical damage. I routinely inspect and clean mount contacts with a soft brush, and I avoid forcing mounts if they feel stiff. When using adapters, ensure they are snug and lock securely to prevent micro-movements. For optimal performance, consider applying a small amount of contact cleaner specifically designed for electronic contacts, like DeoxIT Gold, which improves conductivity and longevity.
Store Your Equipment Properly
Climate-controlled storage is vital. I store my lenses in sealed, padded cases with silica gel packs to absorb moisture. This prevents fungus growth and corrosion, especially if I work in humid environments. Routine inspection of storage conditions saves you from costly repairs or replacements later on.
Plan for Long-Term Care
Looking ahead, investing in a professional lens servicing plan can be worthwhile. Many manufacturers offer calibration and repair services that keep your gear performing like new. Additionally, keeping a detailed maintenance log helps track your gear’s health and schedules preventive care. As technology progresses, expect new tools like AI-powered lens analyzers, which can detect micro-defects invisible to the naked eye, to become standard in professional workflows.
Finally, I encourage you to try out advanced cleaning and calibration techniques—like ultrasonic cleaning for lens elements or using software solutions for focus stacking calibration. These might seem daunting at first, but they can dramatically extend your gear’s lifespan and maintain cinematic quality over years of demanding use.
In conclusion, consistent maintenance and the right tools are your best allies in preserving the performance of your cine lenses and camera gear. Want to dive deeper into optimizing your setup? Check out latest lens innovations and stay ahead of the curve. Remember, well-maintained gear isn’t just reliable; it’s the foundation of stunning visuals that captivate your audience.
The Hardest Lesson I Learned About Lens Compatibility
One of my biggest lightbulb moments was realizing that not all prime lenses fit every camera mount, which caused hours of frustration on set. I learned the importance of meticulous compatibility checks and how even small mismatches can compromise image quality and delay production timelines. This lesson taught me to always verify mount types before purchasing or trying to adapt lenses, saving time and ensuring cinematic excellence.
What I Wish I Knew About Maintaining Prime Lenses
Regular calibration and careful cleaning are often overlooked but critical for long-term performance. I used to neglect routine maintenance, which led to focus drifts and image softness. Investing in quality cleaning supplies and calibration tools, like the SpyderLENSCAL, can keep your lenses sharp and reliable for years. This proactive approach ensures every shot meets your cinematic standards, no matter how demanding the project.
How Lens Adapters Can Unlock Hidden Creativity
Using high-quality adapters can expand your creative options, but cheap or poorly made ones can introduce focus shifts and degrade image quality. I discovered that choosing adapters with minimal glass elements and proper locking mechanisms preserves sharpness and stability. Exploring these tips helped me get the most out of my gear, turning limitations into opportunities for stunning visuals.
Curated Recommendations for Cine Lens Mastery
My Essential Toolkit for Cinematic Lenses: I swear by Zeiss cleaning kits and professional calibration tools—they’re reliable and gentle on delicate coatings. Latest prime lens innovations keep me ahead of the curve, offering sharper, more contrast-rich images. For comprehensive guidance, the ultimate guide to cine lenses in 2025 has been a game-changer, helping me choose the perfect prime or zoom for any project.
Your Turn to Elevate Your Filmmaking Game
Investing in the right prime lenses and understanding their mounts isn’t just technical—it’s a creative leap. With the right knowledge and care, your cinematic visuals will speak volumes. Don’t let compatibility or maintenance hold you back from your vision. Now, it’s your turn—what’s the biggest challenge you’ve faced with prime lenses? Share below and let’s learn together!


![Fix 256K Ghosting: 3 Prime Lenses With Nano-Shields [2026]](https://lenses.cinegearguide.com/wp-content/uploads/2026/04/Fix-256K-Ghosting-3-Prime-Lenses-With-Nano-Shields-2026.jpeg)
Leave a Reply