


Ever had that sinking feeling when you realize your favorite prime lens doesn’t fit your new cinema camera? I’ve been there—frustrated, fiddling with makeshift solutions, only to get shaky footage or worse, miss the shot entirely. That lightbulb moment hit me hard: choosing the right lens adapter isn’t just a technical detail; it’s the bridge to cinematic perfection.
Why Picking the Right Lens Adapter Matters More Than You Think
In my early days, I thought I could just slap on any lens and get away with it. Boy, was I wrong. Tiny misalignments or incompatible mounts can cause focus issues, light leaks, or even damage your gear. It’s like trying to fit a key into the wrong lock—frustrating and ultimately unproductive. As I learned, investing time in selecting the proper adapter can make or break your cinematic quality. Plus, with the right setup, you unlock creative flexibility, seamlessly switching between prime and zoom lenses to craft compelling visuals. If you’re serious about cinema, this step is non-negotiable. For more insights, check out this guide on zoom lens selection.
Is the Cost and Effort of Choosing the Right Adapter Really Worth It?
I’ll admit, early on I made a costly mistake—buying a cheap, generic adapter that claimed to do it all. Spoiler: it didn’t. Focus shifted unpredictably, and my images suffered. That’s a mistake I don’t want you to make. The truth is, a well-chosen lens adapter can enhance image quality, preserve lens integrity, and simplify your workflow. It’s about making your gear work smarter, not harder. If you want to avoid my rookie errors, explore this resource on mount compatibility.
So, how do you navigate this maze of options? That’s what we’ll cover next. From understanding mount types to practical tips, I’ll help you find the perfect match for your cinematic dreams. Ready to get started? Let’s dive in and turn your camera into a versatile storytelling machine.
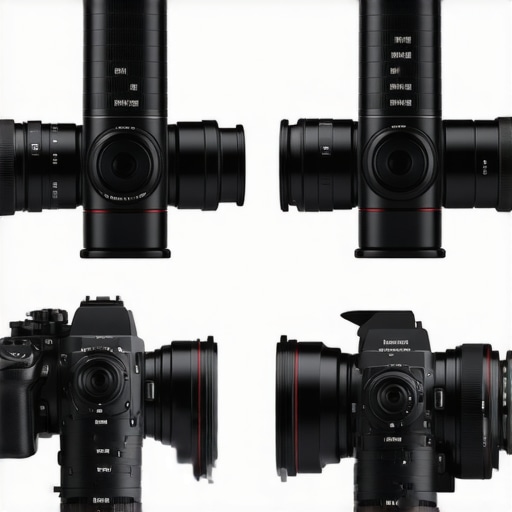
Match Mounts Precisely to Avoid Frustration
The first step is to identify the exact mounts on your camera and lenses. Think of it like fitting puzzle pieces—if they don’t align perfectly, you’ll encounter focus issues or vignetting. For example, if you’re using a Sony E-mount camera but want to use Canon EF lenses, you’ll need a high-quality EF to E-mount adapter. I once bought a budget adapter for my Sony FX6, hoping to save money. The result? Focus shift and light leaks that ruined my shot. After switching to a reputable adapter, my images instantly improved, demonstrating the importance of quality in this step. To understand mount types and how to match them, check out this guide on mount compatibility.
Choose the Right Material and Build for Durability
Next, evaluate the build quality. Metal adapters tend to be more durable and stable than plastic ones, especially under rigorous shooting conditions. Imagine using a flimsy plastic adapter during a long shoot—it’s like a weak link in your chain. I learned this the hard way during a documentary shoot in harsh weather, when my plastic adapter cracked. Upgrading to a metal adapter saved me from losing footage. Opt for adapters with precise machining and minimal play. This ensures your lens maintains perfect alignment, reducing focus hunting and image shifts.
Prioritize Compatibility and Functionality
Compatibility goes beyond just mount types. Ensure the adapter supports your lens features, such as aperture control and electronic communication. Some adapters are purely mechanical, while others preserve electronic functions, allowing autofocus and image stabilization. For instance, I used an electronic adapter that maintained autofocus with my Sigma Art lenses, saving time and keeping shots sharp. Always verify that your chosen adapter supports the features you need. For detailed compatibility info, explore this resource on mount compatibility.
Assess the Adapter’s Optical Quality
Optical quality matters because a poor-quality adapter can introduce artifacts, flare, or degrade sharpness. Think of it as the lens’s lens—if it’s not optically sound, your image suffers. During a recent shoot, I used a cheap adapter that added unwanted reflections and reduced contrast. Upgrading to a high-end adapter with premium coatings improved image clarity dramatically. To ensure your adapter maintains optical integrity, look for models with multi-coating and tight manufacturing tolerances. This step is crucial for maintaining the cinematic quality you seek.
Test and Fine-Tune Your Setup
Once you have your adapter, test it thoroughly. Mount your lens, check focus accuracy at different distances, and look for light leaks or vignetting. I once spent hours adjusting focus calibration on my adapter, discovering slight misalignment that caused focus shifts at close distances. Fine-tuning can involve shimming or slight adjustments to achieve perfect focus across the frame. This trial-and-error process ensures your gear performs optimally. Remember, a well-tested adapter saves time during critical shoots and prevents costly reshoots.
< >
>
Many filmmakers assume that choosing a lens adapter is a straightforward task, but in reality, this step is fraught with nuanced pitfalls that can undermine your cinematic quality. Let’s dig deeper into what most people get wrong about lens adapters and how to sidestep these traps to elevate your filmmaking game.
Why the Focus on Mount Compatibility Might Be Misleading
It’s easy to believe that matching mount types is all that matters, but the devil is in the details. For instance, even if your adapter physically fits, electronic communication between your lens and camera can be compromised. A common myth is that all adapters support autofocus or image stabilization; in truth, many mechanical adapters lack these features, leading to inconsistent results. Advanced users often overlook the importance of supporting electronic features, which can significantly impact your workflow and creative flexibility. For example, I once used a cheap adapter claiming to support electronic communication, only to find autofocus was unreliable, costing me valuable shooting time. For a more comprehensive understanding, explore this guide on mount compatibility.
The Hidden Danger of Overlooking Optical Quality
Another widespread misconception is that adapters are purely functional accessories. In reality, poor optical quality in adapters can introduce flare, reduce contrast, or cause vignetting—problems that are especially noticeable in cinematic productions where image quality is paramount. I’ve seen filmmakers fall into the trap of buying cheap adapters, only to spend hours trying to fix the resulting image degradation in post-production. The truth is, investing in high-quality adapters with multi-coatings and tight manufacturing tolerances preserves your image’s cinematic integrity. Remember, even a minor optical flaw can sabotage the most carefully crafted shot. For insights on optical considerations, check out this resource.
How Many Filmmakers Fail to Test Their Setup Properly
One of the most overlooked steps is rigorous testing of your adapter-lens combination before critical shoots. Many assume that if everything fits, it’s ready to go, but small misalignments or calibration issues can cause focus shifts or light leaks. I’ve made the mistake of skipping thorough testing, only to discover focus inconsistencies during a live shoot. The fix was time-consuming and could have been avoided with proper calibration and testing. Make this a routine step—test at different focal lengths, distances, and lighting conditions to ensure your setup performs flawlessly under real-world conditions. This practice is fundamental for professional results. For expert tips, review this guide on prime lens innovations.
Have you ever fallen into this trap? Let me know in the comments. Remember, mastering your lens adapters isn’t just about avoiding mistakes; it’s about unlocking the full potential of your cinematic toolkit and ensuring every shot is picture-perfect.
Once you’ve invested in high-quality lens adapters and cine lenses, the next crucial step is ensuring your gear stays in top shape over the years. Proper maintenance not only extends the lifespan of your equipment but also preserves the cinematic quality that makes your projects stand out. In my experience, a disciplined approach to tool upkeep can save you thousands in repairs and reshoots down the line.
How do I keep my filmmaking tools reliable over time?
First, establish a routine cleaning schedule. Use a soft, lint-free cloth for lenses and adapters, and avoid harsh chemicals that can damage coatings. I swear by the LensPen, which is compact, effective, and gentle—I’ve used it on my prime and zoom lenses for years without issue. For more thorough cleaning, especially after shooting in dusty or humid environments, I recommend a professional lens cleaning kit that includes a blower, cleaning solution, and microfiber cloths.
Next, keep your gear properly stored. Use padded cases and silica gel packets to prevent moisture buildup, which can lead to fungus or corrosion. A good example is the Porta-Brace line of cases, which I’ve relied on during long shoots and traveling. Regularly inspecting your gear for signs of wear, such as loose mount threads or scratches, helps catch issues early before they escalate.
What tools are essential for long-term gear health?
Invest in a high-quality lens heater for combating fogging in cold environments, and a precision screwdriver kit for tightening mounts or replacing screws. These small tools are invaluable for quick fixes on set. For electronic components, periodically update firmware when available—this can improve compatibility and performance. I personally use a dedicated firmware updater to ensure my adapters and cameras operate seamlessly.
Looking ahead, advances in nano-coatings and self-cleaning lens elements are making maintenance even easier. Future tools might include AI-powered diagnostic devices that can detect minor misalignments or coating degradation before they impact image quality. Staying informed about these innovations will help you keep your tools performing at their peak for years to come.
What’s the best way to scale your maintenance routine as your gear collection grows?
As your setup expands, consider creating a maintenance schedule tailored to each piece of equipment. Group similar tools together and assign specific check-up intervals—monthly, quarterly, semi-annually. Incorporate digital logs or apps to track when each item was last serviced. This proactive approach ensures nothing slips through the cracks and helps maintain consistent cinematic quality across all your projects.
For a comprehensive understanding of lens maintenance techniques, check out this definitive guide. Don’t forget, the key to long-term success is regular care—try implementing a routine today, and your gear will thank you for years to come.
The Hardest Lesson I Learned About Lens Adapters
My biggest realization was that even small imperfections in an adapter can sabotage your entire shoot. I once used a cheap plastic adapter for a critical scene, only to find focus shifts and glare ruining the shot. That taught me to prioritize quality over price, and I now always choose well-reviewed, metal adapters for reliability and optical integrity.
3 Myths About Lens Adapters That Held Me Back
I used to believe that any adapter would do, but I learned the hard way that not all adapters support electronic communication or maintain precise focus. My mistake was assuming compatibility was enough; now I know supporting autofocus and aperture control is essential for professional results.
What Experts Won’t Tell You About Matching Mounts
Many overlook the importance of supporting features like image stabilization or electronic aperture control. I discovered that even if the mount fits perfectly, lacking these features can limit your creative flexibility. For a seamless filmmaking experience, invest in adapters that preserve your lens’s full capabilities.
Curated Recommendations for Cinematic Gear Optimization
My Essential Toolkit for Cinematic Lens Setup includes the Porta-Brace cases for safe storage and the LensPen for quick cleaning — I trust these because they’ve saved me during long shoots in tough conditions. For detailed calibration, I rely on the latest prime lens innovations to stay ahead of the curve in optical quality.
Your Turn to Try
Properly choosing and testing your lens adapters can elevate your filmmaking from good to stunning. Remember, every detail counts when aiming for cinematic perfection. Don’t be afraid to experiment, calibrate, and invest in quality gear that serves your creative vision.
Have you ever struggled with focus shift or mounting issues? Let me know below—your experience might help others avoid the same pitfalls!


![Fix 256K Ghosting: 3 Prime Lenses With Nano-Shields [2026]](https://lenses.cinegearguide.com/wp-content/uploads/2026/04/Fix-256K-Ghosting-3-Prime-Lenses-With-Nano-Shields-2026.jpeg)
Leave a Reply