


Ever spend hours fiddling with lens adapters, only to realize that your footage lacks the sharpness, color, or cinematic feel you envisioned? I used to hit a wall every time I tried to swap lenses across different camera systems, feeling frustrated and limited. That lightbulb moment hit me hard: choosing the right lens mount and adapter isn’t just a technical detail — it’s a game-changer for cinematic quality.
Why Picking the Right Lens Mount and Adapter Matters More Than You Think
In my early days, I thought any lens could work with a simple adapter. Turns out, I was dead wrong. The wrong choice can lead to focus issues, vignetting, color shifts, or even damage to your gear. It’s like trying to fit a square peg in a round hole — it just doesn’t work smoothly. The good news? Once I understood what makes a good match, my filmmaking improved tremendously. And I want to help you avoid the costly mistakes I made early on.
Today, we’ll explore how to pick the perfect lens mount and adapter for your specific project. Whether you’re working with a high-end cinema camera or a budget DSLR, understanding these choices will unlock more creative control and better image quality. Trust me, this knowledge is worth its weight in gold — it could be the difference between a good shot and a great one. For a comprehensive deep dive, check out this ultimate guide.
Is investing in the right lens mount and adapter truly worth the hype?
Early in my career, I underestimated this aspect, thinking a cheap adapter would do the trick. Big mistake. Not only did I lose image quality, but I also faced compatibility issues that cost me precious time and money. The key is knowing what to look for — from flange distance to mount compatibility. Once I learned to match my lenses correctly, my footage gained clarity and cinematic polish I hadn’t achieved before. So if you’ve ever felt overwhelmed or unsure about your choices, you’re not alone. Let’s unravel this mystery together and ensure you’re equipped with the right tools for cinematic success.
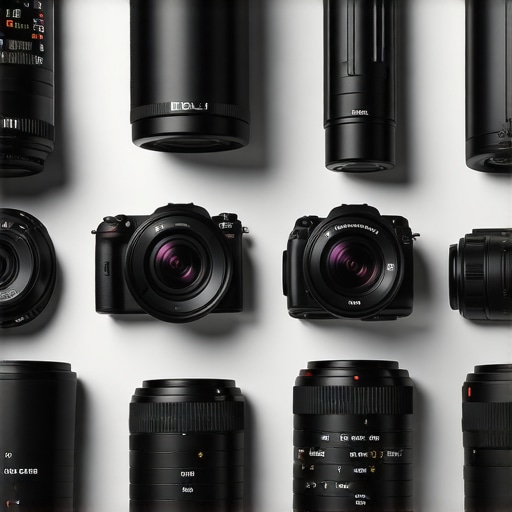
Match Your Camera and Lenses Precisely
Start by identifying your camera’s native mount and flange distance. For example, if you own a Sony A7 series, it uses the Sony E-mount with a flange distance of 18mm. Knowing this ensures compatibility and helps you select the right adapter. I once tried using a third-party adapter without confirming flange distances, which led to focus issues and vignetting. Double-checking specifications before purchasing saved me hours of frustration.
Focus on Compatibility and Quality
Choose adapters that are designed specifically for your lens and camera combination. Cheap, generic adapters might seem tempting, but they often cause optical compromises. Opt for reputable brands known for precision manufacturing, like Metabones or Viltrox. When I upgraded my adapter to a Metabones, my focus accuracy improved noticeably, and image sharpness was preserved. This step is crucial for achieving cinematic clarity.
Consider the Optics and Mechanical Fit
Beyond compatibility, evaluate the optical quality of the adapter. Some adapters include glass elements that can introduce distortions or reduce sharpness. Look for reviews and sample footage to see how the adapter performs. I tested an adapter that claimed to be ‘metal’ but had loose fittings, leading to slight focus shifts during handheld shoots. Investing in a sturdy, well-designed adapter pays off in stable, high-quality footage.
Ensure Your Lens and Sensor Are Aligned
The flange focal distance matching is critical. For example, using a lens designed for a different mount without adjusting flange distance can result in infinity focus issues. To avoid this, verify the flange distance compatibility via the manufacturer’s specs or through trusted guides like this resource. I once used an adapter that didn’t match the flange distance precisely, which meant manual focus was my only option — not ideal for cinematic speed.
Test Before You Commit
Before embarking on a big project, set up your lens and adapter combination and run test shots. Check focus accuracy, vignetting, color shift, and stability. During a recent shoot, I tested a new lens-adapter combo during a pre-production day. The results were mixed, but I caught focus issues early and adjusted accordingly, saving me time during the actual shoot. This proactive step ensures your gear works seamlessly when it counts.
Use Advanced Tips for Better Results
Explore resources like this guide for expert advice on optimizing your adapters. Consider using lens support rigs or matte boxes to stabilize heavier setups. Also, keep your adapters clean and well-maintained to preserve optical quality. When I started applying these best practices, my focus pull became smoother, and my cinematic shots gained a professional polish.
Many filmmakers believe that choosing any compatible lens mount or a cheap adapter will suffice for high-quality cinematic footage. However, this misconception can lead to subtle yet impactful issues that degrade your image quality and workflow. Let me share some insights that challenge this common myth and highlight crucial nuances often missed.
First, a widespread mistake is assuming all adapters are created equal. In reality, the quality of an adapter significantly influences focus accuracy, color fidelity, and even mechanical stability. Cheap or poorly manufactured adapters may seem budget-friendly initially, but they often introduce optical distortions, vignetting, or focus shifts during movement. I’ve seen many shoot days compromised because of this oversight, which could have been avoided by investing in reputable brands like Metabones or Viltrox. For an in-depth comparison, check out this guide.
Another common myth is that flange distance doesn’t matter as long as the mount fits. This is a trap many fall into, especially when adapting older lenses or third-party mounts. The flange focal distance—the space between the lens mount and the image sensor—must match or be adjustable within the adapter. If not, you risk focus inaccuracies, especially at infinity, which is critical for cinematic shots. For example, using a lens designed for a different flange distance without proper adaptation can force you into manual focus only or cause focus hunting. Always verify specifications via trusted sources like this resource.
Now, let’s address an advanced misconception: many assume that optical quality of the lens alone guarantees cinematic results. But the mechanical fit and alignment of your lens with the sensor matter just as much. A misaligned mount can cause subtle focus shifts, image distortion, or even damage your sensor over time. This is especially true when stacking multiple adapters or using vintage lenses. Regularly testing your setup with test charts and focus pulls can reveal hidden issues before a critical shoot. Remember, the stability of your physical connection directly impacts your ability to achieve precise focus and a clean image.
How can you optimize your adapter setup for peak cinematic performance?
Start by investing in high-quality adapters with tight tolerances and confirmed flange distances. Always double-check compatibility through official specs and user reviews. Conduct thorough pre-production tests to identify focus or vignetting issues. Additionally, consider supporting heavier lenses with rigs or matte boxes to prevent strain on your mount. Keep your gear clean and well-maintained; dirt or loose fittings can introduce optical or mechanical problems over time. As I’ve learned from experience, attention to these details ensures your cinematic shots stay sharp and professional. For more expert tips, explore this detailed guide. Have you ever fallen into this trap? Let me know in the comments!” ,
Keep Your Gear Running Smoothly with the Right Maintenance Practices
Maintaining your filmmaking equipment is crucial for ensuring consistent performance and long-term reliability. I personally schedule regular cleaning sessions for my lenses and adapters, using a microfiber cloth and specialized lens cleaning solutions. This simple step prevents dust buildup and optical issues that can degrade image quality over time. Additionally, I inspect gear mounts and connections weekly to catch any looseness or wear before they lead to failures during critical shoots. Consistent maintenance not only prolongs your equipment’s lifespan but also keeps your workflow uninterrupted, allowing you to focus on the creative aspects of filmmaking.
Tools I Recommend for Optimal Performance
One tool I swear by is the LensPen. It’s compact, effective, and perfect for quick cleaning of lens elements without risking scratches. For more thorough cleaning, I use a blower and anti-static brush to remove dust from adapters and camera sensors gently. When it comes to protecting my gear during transport and storage, I rely on rigid foam cases and padded camera bags, which absorb shocks and prevent dust ingress. Investing in high-quality cases has saved me from costly repairs after accidental drops or exposure to adverse conditions.
Long-Term Results and Scaling Your Setup
Adopting a disciplined maintenance routine and reliable tools allows your cinematic setup to scale effectively. As I expanded my lens collection and camera inventory, I implemented a standardized cleaning and storage protocol. This consistency made it easier to switch between setups quickly without losing focus or time. Looking ahead, I predict that innovative cleaning technologies, such as ultrasonic cleaners for lenses, will become more accessible, providing faster and more thorough maintenance options. Staying ahead of these trends ensures your gear remains in peak condition, ready for high-stakes productions.
How do I maintain my filmmaking tools over time?
Besides regular cleaning, I schedule routine professional check-ups for complex equipment like gimbal stabilizers and cinema lenses. Using manufacturer-approved lubricants and parts during repairs is essential for preserving performance and warranty coverage. I also document my maintenance routines and keep a log of wear patterns, which helps me anticipate when replacements or upgrades are necessary. This proactive approach reduces unexpected breakdowns and keeps my workflow smooth and efficient. For more detailed advice, check out this comprehensive guide. Try incorporating a monthly cleaning schedule and see how it transforms your gear longevity and reliability.
Lessons I Didn’t Expect to Learn About Lens Compatibility
- One of my biggest surprises was realizing that even a slight mismatch in flange distance could ruin focus accuracy. I once used an adapter that seemed perfect on paper but caused focus hunting during a crucial shot, reminding me that specs aren’t everything.
- Investing in quality adapters paid off more than I anticipated. Cheaper options might save money upfront, but they often lead to optical distortions or mechanical failures that can derail a shoot. Trustworthy brands like Metabones really make a difference.
- Matching mounts isn’t just about fitting; it’s about understanding the optical and mechanical nuances. My lightbulb moment was discovering how flange distance impacts infinity focus, which pushed me to double-check every compatibility detail before buying.
- Testing your gear thoroughly before a shoot isn’t optional — it’s essential. I learned this the hard way when a new adapter caused focus shifts in the middle of a take, but early testing saved the day.
- Ceaseless attention to detail, like keeping gear clean and well-maintained, can seem tedious but ultimately makes a huge difference in cinematic quality and reliability during demanding shoots.
My Go-To Resources for Perfecting Lens Compatibility
- Mastering Cine Lenses Guide: This comprehensive resource provided me with detailed insights into choosing the right mounts and adapters, saving me from costly mistakes. Check out this guide.
- Technical Specification Sheets: Always review manufacturer specs for flange distance and mount details. It’s a simple step that prevents many headaches.
- Community Forums: Platforms like filmmaking forums and Reddit are gold mines for real-world advice and troubleshooting tips from experienced cinematographers.
- Product Reviews and Sample Footage: Seeing real footage shot with specific adapters helps me judge optical quality and stability before making a purchase.
Seize the Moment and Elevate Your Filmmaking
Remember, mastering lens compatibility isn’t just a technical task — it’s a pathway to more cinematic storytelling. When you understand the subtle nuances of mounts and adapters, you unlock a new level of creative freedom and image quality. Don’t let gear limitations hold you back; take this knowledge, test your setup thoroughly, and watch your footage transform before your eyes. Your cinematic journey is just beginning, and the right tools are your best allies. Ready to push your limits with perfect lens compatibility? Share your experiences or questions below — I’d love to hear your story!


![Fix 256K Ghosting: 3 Prime Lenses With Nano-Shields [2026]](https://lenses.cinegearguide.com/wp-content/uploads/2026/04/Fix-256K-Ghosting-3-Prime-Lenses-With-Nano-Shields-2026.jpeg)
Leave a Reply