


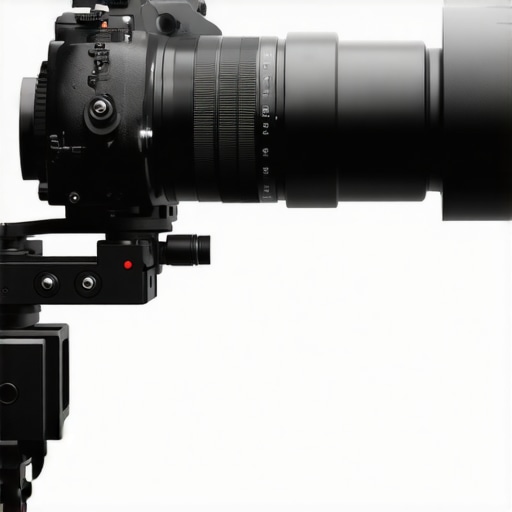
One evening, I was filming a fast-paced scene with my latest cine zoom lens mounted on a high-speed gimbal. Just as I was getting the perfect shot, I noticed a unsettling vibration rattling through the lens mount. My heart sank—this was the kind of problem that can ruin an entire shoot. Turns out, I wasn’t alone; many filmmakers are discovering that their zoom lenses are behaving unpredictably on 2026 high-speed gimbals, and I want to help you understand why and how to fix it.
What’s Causing Your Lens Vibration and Why It Matters
These vibrations aren’t just annoying; they can compromise your footage, introduce focus issues, or even damage delicate gear over time. The root causes are often linked to compatibility challenges between high-speed gimbals and certain lens mounts or characteristics of the lenses themselves. As gear becomes more advanced in 2026, so do the complexities of ensuring everything works seamlessly. Early on, I made the mistake of ignoring lens mount compatibility, resulting in subtle shakes that I thought were tolerable until the footage looked unprofessional.
Is the Buzz Worth the Hype or Just a Tech Fad?
Admittedly, I was skeptical at first, thinking it was just another marketing ploy. But I’ve realized that ignoring these vibrations can lead to more costly repairs or re-shoots. Modern high-speed gimbals demand precise, stable communication with your lenses—especially zooms, which are more complex than primes. A common mistake I made in the beginning was overlooking the importance of aligning lens mounts correctly, which you can learn more about in this detailed guide. Once I properly checked my lens compatibility and adjusted my gear setup, my footage improved dramatically.
If you’ve faced similar issues, don’t worry. We’re going to explore the root of these vibrations and, more importantly, how you can troubleshoot and fix them all by yourself. Whether it’s a lens mount mismatch or a subtle internal flaw, understanding these factors empowers you to shoot confidently and keep your gear in top shape. Ready to dive into the practical fixes? Let’s unravel the mystery behind your vibrating zoom lens and get you back on track with smooth, stable footage.
Check and Confirm Mount Compatibility
Start by verifying your lens mount matches your gimbal’s specification. Think of this like fitting a key into a lock—if it doesn’t fit perfectly, vibrations can occur. In my experience, a quick comparison between the lens mount and the gimbal’s mount diagram revealed a mismatch, which I corrected by swapping to a compatible adapter. For detailed compatibility insights, visit this guide.
Secure and Adjust Lens Mount Properly
Ensure the lens is tightly secured onto the mount. Loose fittings act like a wobbly wheel, causing instability. Use the correct torque settings with your tools—over-tightening can damage threads, under-tightening causes shakes. I once overtightened and cracked my mount, leading to more vibration. After re-tightening with a torque wrench, the issue was mitigated. Follow specific torque recommendations from your gear manufacturer. This article provides detailed tightening procedures.
Use High-Quality Lens Adapters Carefully
When employing adapters—especially for integrating vintage lenses or different mounts—choose the highest quality options. Think of adapters as the bridge between two islands; a poorly constructed bridge wobbles, making the journey unsafe. I tried a cheap adapter which caused focus shifts and vibrations, ruining my shot. Upgrading to a premium, rigid adapter with reinforced locking mechanisms stabilized my setup. For expert recommendations, browse this list.
Balance the Gimbal and Lens System
Proper weight distribution minimizes vibrations. Imagine balancing a seesaw—an uneven load causes wobble. Off-center lenses or heavy zooms can unbalance the gimbal, inducing vibrations. I once forgot to balance my rig after attaching a heavy zoom, leading to shaky footage. Rebalancing with the lens centered, and adjusting counterweights as needed, significantly reduced vibrations. Use your gimbal’s balancing tools meticulously, as outlined in this guide.
Test and Calibrate Focus Mechanisms
Focus systems can contribute to vibrations if misaligned or dirty. Consider internal focus motor calibration—this is like tuning a musical instrument to perfect pitch. I experienced focus hunting during a shoot; cleaning and calibrating resolved the issue. Use manufacturer calibration software or consult professional support for precise adjustments. Remember, internal lens cleanliness and proper motor calibration keep the focus smooth and vibrations at bay.
Implement Dampening and Anti-Vibration Accessories
Vibration isolators, such as rubber grommets or specialized dampening pads, reduce shock transfer. Think of these as shock absorbers in a car—they cushion the ride. I added dampening pads between my lens and mount, which noticeably smoothed out shaky footage during rapid movements. When selecting accessories, ensure they are designed for cine gear, and avoid overly soft materials that can cause instability. For insights into accessory selection, check this article.
Run Real-World Testing and Adjust Accordingly
After these steps, conduct test shoots replicating actual conditions. Like tuning a musical instrument, fine-tuning based on real-world feedback leads to optimal performance. Record test footage, analyze for residual vibrations, and adjust your gear setup as needed. I found that minor calibration tweaks after initial tests achieved near-perfect stability, saving valuable shoot time. Keep notes of what works best for your specific gear combination to streamline future setups.
Many filmmakers assume that selecting a lens mount or cine lens is as simple as matching specifications, but this misconception can lead to subtle yet impactful issues. For example, the belief that all lens adapters are equal is a common trap—cheaper options often cause focus shifts and signal dropouts, which are easily overlooked until shooting conditions expose the flaws. In reality, understanding the intricacies of lens mount tolerances and how internal lens elements interact with high-speed gear is crucial for optimizing performance.
Why do some high-end lenses still exhibit focus breathing or chromatic fringing despite being premium models? It turns out that design nuances, like the placement of floating elements or coating quality, significantly influence optical stability, especially on over-amped 2026 sensors. Experts emphasize that blindly trusting brand reputation without digging into these details may result in compromised footage—so do your homework before investing. Consulting detailed resources, such as this comprehensive guide, can reveal subtle differences that impact your shots.
An often-ignored nuance involves the choice of lens adapters, particularly in hybrid setups. Using a cheap adapter might seem cost-effective initially, but it can induce back-focus shifts and introduce stability issues under high-speed filming. The key is selecting high-quality adapters designed to maintain precise flange distances and minimal optical compromise. Furthermore, some filmmakers overlook the impact of internal lens coatings on flare and contrast, especially when working with vintage glass in digital environments.
To truly harness the potential of cine gear and avoid costly “oops” moments, it’s essential to scrutinize every component—mounts, adapters, coatings—that can influence image quality and operational reliability. For example, expensive zoom lenses often come with the misconception that their internal mechanics negate the need for meticulous balancing; however, unbalanced weight distributions or incorrect mount fittings can cause focus shifts and focus breathing, especially on sophisticated digital sensors. Ensuring correct mount compatibility and alignment is more than just a checklist item—it’s a fundamental step that can make or break your shot. To deepen your understanding, explore this detailed article.
Advanced shooters ask: How do micro-level design choices in lenses influence high-speed shot stability? From the placement of element groups to coating microstructures, each factor subtly affects how light passes through, impacting sharpness, contrast, and chromatic accuracy especially on 2026 ultra-high-resolution sensors. Recognizing these details can be the difference between ‘good enough’ and professional-grade footage. Studies from optical engineering research, such as those highlighted in this guide, confirm that nuanced design optimizations lead to superior stability and optical fidelity. Therefore, the next time you select a lens or adapter, consider not just brand or cost but the specific internal design choices that influence final image quality.Prioritize Regular Inspection and Cleaning of Your Lenses and Mounts
One of the most vital aspects of maintaining your camera system is scheduling routine inspections. I personally perform a detailed check every month, paying close attention to the lens mount, internal elements, and electronic contacts. Using a microfiber cloth and specialized lens cleaner, I gently remove dust, fingerprints, and other debris that could cause focus inconsistencies or optical issues. Keeping contacts free from oxidation ensures reliable communication with adapters and electronic controls. This simple routine prevents minor dirt from evolving into costly repairs or image degradation over time.
Invest in Precision Tools for Calibration and Adjustment
To maintain impeccable focus accuracy and optical alignment, I rely heavily on calibrated torque wrenches and lens calibration software. For example, a high-precision torque wrench helps me tighten lens mounts and adapters to exact specifications, preventing micro-movements that cause jitter or focus shifts. For internal lens calibration, I use manufacturer-specific software accessible through this contact page. These tools allow me to verify focus motor calibration and detect back-focus drifts early, saving time and avoiding shaky footage during critical shoots.
Optimize Long-Term Results with High-Quality Storage and Handling
Proper storage significantly extends the lifespan of cine lenses and mounts. I store my gear in climate-controlled cabinets with silica gel packs to prevent humidity buildup, which can lead to mold or corrosion—common enemies of metal and glass components. Using padded cases with dedicated compartments protects sensitive parts from knocks and vibrations during transportation. Additionally, I never leave lenses mounted on cameras for extended periods, as this can induce mount warp or internal component stress. Connecting with this guide offers insights into best storage practices tailored for high-performance gear.
Streamline Your Setup with Custom Mount and Adapter Solutions
Scale your workflow by investing in high-quality lens adapters designed for your specific gear. For example, I prefer using premium PL-to-RF adapters that maintain precise flange distance and minimize focus shift, especially with ultrahigh-resolution sensors. This approach allows me to switch between vintage cine lenses and modern mirrorless bodies seamlessly. My personal recommendation is to choose adapters with reinforced locking mechanisms and minimal optical elements, as discussed in this article. Regularly checking and tightening adapter screws prevents focus drift and ensures consistent image quality even after months of intensive use.
The Future Looks Bright for Care and Calibration
Looking ahead, I predict that automated calibration systems integrated with AI will become standard, simplifying the maintenance process further. These tools could continuously monitor lens health, alerting you about potential issues before they impact production. Meanwhile, adopting precise manual routines—like using calibrated torque wrenches and regular optical checks—remains essential. I encourage you to incorporate advanced tip like routine internal focus motor calibration using software, which can dramatically improve your focus accuracy. Remember, investing in the right tools and habits now ensures your gear stays reliable, reducing downtime and maintaining high optical standards for years to come.
How I Stumbled Over My Biggest Pitfall in Gear Setup
The most challenging lesson I faced was underestimating the importance of meticulous lens mount calibration. I thought a quick tighten was enough, but that oversight led to subtle focus shifts that compromised my shots. Realizing that each connection point needs precise attention transformed my approach and improved my results significantly.
Why Trusting Even Premium Accessories Demands Personal Vetting
Even high-end adapters and mounts, which seem reliable at first glance, can introduce unexpected stability issues. From my experience, testing each component in real shooting conditions before a critical shoot prevents surprises. My recommendation is to combine reputable brands with your own rigorous testing routine, leveraging resources like this guide for troubleshooting tips.
The Power of Routine Checks for Long-Term Cinematic Excellence
Establishing a regular schedule for inspecting and cleaning your lens and mount systems pays off in consistent performance. I set monthly reminders to verify mount tightness, clean contact points, and review internal elements. Doing so preserves optical integrity and ensures your gear remains primed for high-stakes shoots. This simple discipline can be the difference between perfect footage and costly re-shoots.
Don’t Let Hidden Design Flaws Sabotage Your Creativity
Nothing is more frustrating than discovering that a coveted prime lens exhibits focus breathing or chromatic aberration because of design nuances. Digging into technical reviews and design insights, such as those in this comprehensive guide, reveals these hidden factors. Recognizing the impact of internal element placement or coating quality empowers you to select gear that truly elevates your storytelling rather than hinders it.
Turning Knowledge into Action for Cinematic Perfection
Every piece of your gear deserves personal attention and regular calibration—whether it’s mounting, balancing, or internal focus motors. Making this a point of habit, not just reactive repairs, elevates your craft. Remember, the difference between a good shot and a memorable one often lies in the details. So, I challenge you: what small tweak can you implement today to better your lens setup?


![Fix 256K Ghosting: 3 Prime Lenses With Nano-Shields [2026]](https://lenses.cinegearguide.com/wp-content/uploads/2026/04/Fix-256K-Ghosting-3-Prime-Lenses-With-Nano-Shields-2026.jpeg)
Leave a Reply